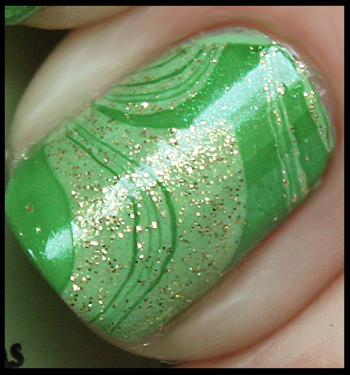
Hey gals! As I said earlier that I am starting a series of posts that would give some beauty related information from worldwide cosmetics and beauty sites, I come across while surfing the net. So here is the second part of the series and it is also related to nail art :D You may think I am going crazy for nail arts but I have to tell you, I am just amazed with the creativity the polish addicts come up with everyday and thought of sharing the same with all of you and make you go a little crazy for nail-arts like me :D
Today's topic would be Water Marbling.
 |
| All images taken from Google |
Don't they just look awesome. Here is the process of how you can do it:
- Fill a shallow, wide-mouthed cup or bowl about 90% full with water.
- Add desired colors of paint to the water. Have your paints open and ready to go, as they will harden quickly on the surface of the water. Drop a drop or two of the colors you want to use on top of the water. A high-quality nail polish works best for this method.
- Create the marbled design in the water. Repeatedly drag a pin or toothpick through the the surface.
- Use a cotton swab to remove the excess polish from the surface while your nail is still submerged in the water.
- Remove nail from water and use a cotton swab (with acetone if necessary), to clean up the edges and remove polish from the finger. (Info From Wiki)
Here are some tutorial videos I liked on YouTube. Go and watch and try them out. Let me know how was it!!
Hope you guys enjoyed the post! :)
P.S: I crossed 60 subscribers...YAY!! Thank you all for reading,commenting and supporting my blog :-*


