Showing posts with label Beauty Check. Show all posts

Beauty Check - Part 12


So, Aztec is the new Neon this seaon?!
But wait, what's AZTEC?

Aztec clothing was worn by the tribes that made up the Aztec empire in central Mexico. Its prints are all about strong shapes, fabrics filled with triangles and circles, black outlines and lots of strong colours. And this trend made it's way to various runway this fall season, be it the Paris Fashion Week, or London Fashion Week SS13.

   
And being a a Nail Art freak,I was searching around to see some Aztec inspired Nail arts and see what I found,

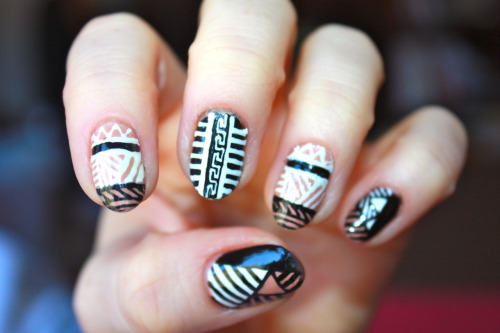


Aren't they droolworthy! :D

I remember as a kid/teenager, I used to try doodling on my nails, but they were never so beautiful and neat. 

Want to see how it can be done? Follow this simple tutorial,


Let me know if you have tried this out! ;) 

**Images are sourced from Google for representation purpose only. Read my disclaimer.  
 

Beauty Check - Part 11

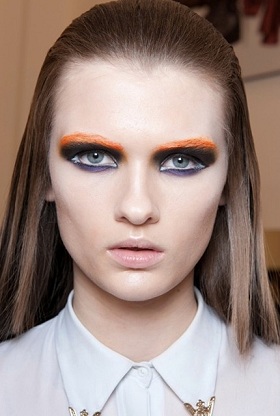
Eyebrows are often the neglected part in our makeup routine, however they are a very important part of our face as it frames and defines our face. Recently, there has been a lot hullabaloo about different brow styles. Thick, bushy, painted eyebrows have been 'in' the past season.


The Fall 2012 trends is about taking it one step further. Adorn those brows with some embellishments.


Pasted feathers or gems? Take your pick.


Or do you like studs ( not horses silly! :P )?


Or you can't have enough of neon?


What do you think? After those neon lipsticks, are we ready to sport these crazy eyebrows too?

**Images are sourced from Google for representation purpose only. Read my disclaimer.

Beauty Check - Part 10

The main aim of this series is to give you a glipse of new (or not so new) styles and trends. And today's topic would be some Hair Braiding techniques.

Now, as much as I focus on different makeup styles, color trends, etc.  one part of my styling has been constant and boring, which is, my hairstyle. Either I keep it simply open or tie it up in a ponytail. I love to checkout the new hairstyle techniques on youtube videos though never seem to implement them on myself successfully, because a) I am lazy and b) I am too lazy to think of b. :P

Coming back to today's topic of different hair braiding techniques, you must have already heard of french braid, fishtail braids, mermaid tail braids, waterfall braids, and much more. 


To up the complexity further, here comes another braiding technique called Weave Basket Braiding technique. Won't speak much, let the pictures do the talking,


Interesting isn't it! Just hope my hands won't fall off while trying this out! :P And if you are wondering how to do this, here are two video tutorials I came across, that might help you out, but I am warning you, this ain't easy. ;)

**All images are from Google.

Beauty Check - Part 9 New makeup trends that aren't exactly new!

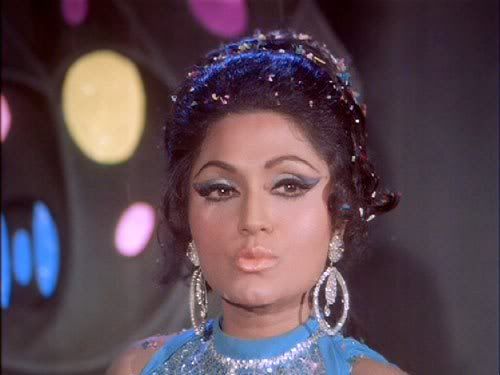
It so happened, that yesterday I was having my dinner and my father had put on some music channel on the TV that was showing some old bollywood (Indian hindi movies) songs of 60s and 70s and some older even than this, and suddenly I realized I am concentrating on the makeup of the heroines, rather than the songs or my food. ;) And guess what I saw, all the recent and prevalent makeup trends were portrayed by all these beautiful actresses of yesteryears of Indian cinema. So I decided to post about it in my series of Beauty Check. I am going through only some of my finds,

Coral lips/Bright orange/Neons lips are so in this season. But can you remember Meena Kumari from Pakeezah (1972) with her orangish lips?


or Sharmila Tagore from Kashmir Ki Kali (1964)?


Speaking of Sharmila, if you thought nude lips is all about Kim Kadarshian, think again! Here is one diva who did all of the bold winged liners, nude lips, androgynous brows, in the movie An Evening In Paris (1967).


Vibrant eye makeups? Yes we have it too! Remember Helen and Bindu?


And who can rock the sexy red pout better than the ever gorgeous Rekha?


Well this post turned out to be an ode to bollywood divas ;), who rocked these trends many years ago through their beautiful movies. The trends are not new, but they keep coming back you see. Who knows 50 years from now you would again see these trends rocking the beauty and fashion world!

All images are from Google.

Beauty Check - Part 8

Hey I am back again with this series! And today's topic would be Ombré Lips. The "Ombré Effect" trend started from last year, be it in Ombré Nails, Ombré Hair and now we have Ombré Lips! :D

What is this Ombré Effect?
Ombré is French for an effect with a gradual colour transition from light to dark.

How to achieve the Ombré Effect pout?
  • Find two contrasting lip colors (preferably matte) that are in the same color family.
  • Apply the darker, opaque lipstick and fill in the entire lip.
  • Apply the lighter lipstick in the middle of your pout.
  • Blend and add some clear gloss.
  • Keep the rest of you makeup neutral.

Here is a video tutorial to help you!


Skip to 2.00 minutes to see the tutorial.

Hope you liked the post! Do let me know if you enjoy this series! You can check the other posts under this series here.

I don't claim the ownership of any pictures/videos in this post. They have been used for representation purpose only. Read my disclaimer.

Beauty Check - Part 7

It has been too long that I didn't post anything new in this series. But guess what, I found some interesting trend to share with you lovelies out there!

Today's topic in this series is Hair Chalking!

What's that exactly?
Hairstyles are always developing from time to time. We saw trends of highlighting, feather extensions, etc. to add that glam to the regular hair color.

Hair Chalking just made an entry to this long list of hair coloring/accessorizing methods and is the easiest and most affordable of all the processes.


How to do it?
  • Dampen the strands of hair.
  • Colour them in with the pastel shade of your choice.
  • Wait for hair to dry.
  • Seal the colour in with a straightening iron.

Or you can follow this video by one of my fave blogger/vlogger, Meredith Jessica. Got the idea from here first and then did my own little research ;)


Would you like to try this?? I am really tempted to try, only to see the shocked expression on my mom's face :P

Check out my other posts in this series.

Source: 1
Images are from Google.

Beauty Check - Part 6 and a DIY

Good morning girls. (Wow, I just sound like a strict, old princi of some 'girls only' school..uhmm I belonged to one :P :P ). Anyway, back to the series, today's topic is FRANKEN POLISHES and no, this is nowhere related to Frankenstein. 

Frankening is the process of mixing different polishes, pigments, glitter, etc to create a unique nail polish, or "franken polish". You can create jellies, glitters, and even mattes frankening. (Yes I am back on another nail topic...the series should be named Nail Check now :P)


From Google Images


So on a whim, I wanted to create a duochrome franken polish.The 'duochrome' part failed but I thought of sharing my naive experience and tutorial with you guys anyways.

First let's see, what you would need,
A small cap from any old bottle, a good applicator brush all cleaned up, 2-3 pigments (I used eyeshadow pigments that I might never use on my eyes) of your choice of colors, a new and clean toothpick :P


Let's get started with the experiment then. I used only the blue and green eyeshadows thinking of getting the duochrome effect. First, I added some blue pigment into the cap. Measurement is according to your need. I didn't do any specific measurement.

Then I added the green pigment in the cap and stirred both pigments with the toothpick to mix them.


Then add some clear basecoat/topcoat nailpolish.


And stir it well to mix using the toothpick.
I wasn't satisfied with the runny consistency and the green color so I added a bit more of the blue pigment and tada, I got my own franken polish ready but got disheartened when I didn't see the duochrome effect.


Anyways, it was my first experiment and I am glad that it didn't fail completely and turned out to be a nice aqua green/blue polish.


Here it is on my nails. 

These B.B.B polishes gives a matte finish to nails, dries up superfast, doesn't chip easily, and you can add an optional topcoat to give a bit of glossy look and to order this you can contact me on my toll free number 1234567890 (kidding :P).  Overall I really liked this but removing them takes a little patience.

Have you ever tried something like this? Do share with me :-*

Beauty Check - Part 5

Hi gals! I am back on this series and today's topic is HEEL CONDOMS. I am pretty sure that most you guys already know about this trend since all the fashion and beauty blogs have gone gaga over this season and if you don't then no worries, you will get to know now. I meant to write this post long back, however, it completely slipped off my mind after my exams. Now what are heel condoms?


Contrary to how risqué the name sounds, it is actually quite a harmless accessory for your heels. It is like a cover for the heels which can revamp the look of your stilettos (or any heels for that matter) and also, protect your heels from marks and scuffs, and cover a damaged heel without making you pay a hefty amount at a shoe store.


But who invented this genius idea? 

A 23 year old, finance student and designer by choice in Puerto Rico named Sandrysabel Ortiz got this idea, "If we dress up, why not dress up our shoes?” She has turned an entrepreneur and have her own website for these lovely accessories.

Here are a few more treats for your eyes. :P


Don't they look just adorable (how I wish could wear such huge heels just for these cute accessories :( )

And if you don't want to spend on any, you can do a DIY for heel condoms from any old silk ties or the likes, glamorize it up a bit like in the pictures above and attach it to your heels. Here is a video from YouTube by Sandrysabel for your help.


Hope you guys enjoyed the post! :)
To check out rest of this series, go here. 

***Images are from Google Images. I am not paid/compensated to do this post. Read my disclaimer.

Beauty Check - Part 4

I was neglecting this series for quite a while (honestly I could not find anything to share) but I am back with the Part 4 of this series. (Check Part-1, Part-2 and Part-3 )

Let me start today's topic with some questions. How many of you find using eyeshadows in your makeup procedure a hectic messy task? Do you wish to create those gorgeous smokey eyes or blending those beautiful colors to create some gorgeous look but fail to do so everytime? Well worry no more. It’s not every day an innovation comes along that fundamentally changes the way consumers use a product, but the makeup industry appear to be achieving that feat with press-on eye shadow kits.

From Google Images
Applying traditional eye shadow requires considerable skill, time and expertise with brushes, sponges or other applicators. Matching colours can also be tricky, and eye shadow cakes are prone to crumbling and spilling, leaving consumers with the potential for a mess. These new press-on eye shadow kits, on the other hand, allow consumers to instantly apply professionally created eye-shadow designs without applicators or mess. Each single-use kit is applied to the eyelid using a pre-prepared strip that contains a variety of matched and blended colours. Pressing the strip to the eyelid transfers the colours onto the eyelid in just the right shades, creating a look much like one a professional make-up artist might have created.

From Google Images

You can get some animal prints or other motifs too as eyeshadows. Brands like ColorOn Professional,Eye Majic, Avon provides these Press-on eyeshadow kits.These are single-use, hygienic, hypoallergenic applicators that require no makeup skills, no brushes or secondary applicators. Imagine an eye shadow that is waterproof, crease-proof, and long-wearing that transfers to the eyelid with just a touch.The result is a professional, flawless look every time. 

So what do you think about them? Would you like to try them out? ;) 

If you like my blog then please vote for it at HandmadeReviews 2011 Beauty Blog Awards

**Information provided above is taken from some relevant websites.

Beauty Check - Part 3

Hey gals! I know, I said I would be MIA for a while but couldn't resist to talk to you people as I am so addicted to this blogoverse nowadays!! :)

Here is the third part of the series Beauty Check. Check Part-1 here and Part-2 here if you don't know what I am talking about!

So what's the topic for today? It is temporary lip tattoos!

Okay first let me clarify that I am not a big fan of these but when I came across them, I thought I have to share this with all of you. Some of you might like to go for "off-the-beat" looks and are looking for some crazy new ideas maybe, then here is something you might like to try out when going for some wild-night-parties or wherever you think you can carry them off! 


Image from GoogleImages


What are these? They are the next generation of lip adornment. They’re basically like the nail strips you use in nail-arts, but these are for your mouth.The come in crazy patterns like animal prints, red fishnet, rainbow, and pink polka dot,glitter encrusted styles. 

You can also create your own styles utilizing your own lipcolors.

So what do you think about them? Would you like to try them out? ;)

Beauty Check - Part 2

Hey gals! As I said earlier that I am starting a series of posts that would give some beauty related information from worldwide cosmetics and beauty sites, I come across while surfing the net. So here is the second part of the series and it is also related to nail art :D You may think I am going crazy for nail arts but I have to tell you, I am just amazed with the creativity the polish addicts come up with everyday and thought of sharing the same with all of you and make you go a little crazy for nail-arts like me :D

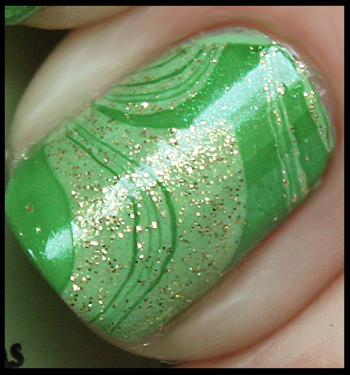
Today's topic would be Water Marbling. 

All images taken from Google

Don't they just look awesome. Here is the process of how you can do it:
  • Fill a shallow, wide-mouthed cup or bowl about 90% full with water. 
  • Add desired colors of paint to the water. Have your paints open and ready to go, as they will harden quickly on the surface of the water. Drop a drop or two of the colors you want to use on top of the water. A high-quality nail polish works best for this method. 
  • Create the marbled design in the water. Repeatedly drag a pin or toothpick through the the surface. 
  • Use a cotton swab to remove the excess polish from the surface while your nail is still submerged in the water. 
  • Remove nail from water and use a cotton swab (with acetone if necessary), to clean up the edges and remove polish from the finger. (Info From Wiki)
Here are some tutorial videos I liked on YouTube. Go and watch and try them out. Let me know how was it!!


Hope you guys enjoyed the post! :)

P.S: I crossed 60 subscribers...YAY!! Thank you all for reading,commenting and supporting my blog :-*

Beauty Check - Part 1

Hey girlies! Wassup??
I thought of starting a series of posts that would give some beauty related information from worldwide cosmetics and beauty sites, I come across while surfing the net. Hence the name "Beauty Check".
So lets see what is in store for you today?

Today I would like to talk about the Nail-art craze spreading all over the world and the latest in it is the "KONAD STAMPING NAIL ART". 


From Google Images


Don't they just look gorgeous! 

So let us know what is actually Konad nail art all about?

"KONAD Stamping Nail Art is a new nail-imprinting kit that lets you put designs by stamping pre-designed images on your nails in minutes. Apply or change designs any time you want, change designs weekly, daily or as many times you want. KONAD Stamping Nail Art kit can achieve delicate details never before achieve by hand painting. Do it yourself in just minutes at home, at a friend's house or bring it anywhere you desire. You can put designs not only on your nails but on mobile phone, earrings, pendant, bracelet, gift box, watches, calculators, clocks, sunglasses or any surface of your choice. With KONAD Stamping Nail Art kit you can create perfect, professional nail designs at a fraction of the time and money, just like a professional nail artiste ... or even better. It's neat and easy !!!  " - info taken from here

They are highly popular in UK,US, even in a few countries in Asia.
Sadly for Indian residents, they are still not easily available everywhere. Heck! we still don't get O.P.I, China Glaze or Sally Hansen here easily.

You can buy KONAD Stamping Nail Art through some special Nail Spas (have mainly seen some Delhi shop yellow pages) or have to opt for online shopping!

Now lets focus on the product. This is how the kit looks like.
From Google Images
It consists of :
i) A Stamping tool (the cylindrical one with a pinkish red end)
ii) Scraping tool (the pink blade thingy at extreme left )
iii) Stamping/Image plates (the silver round discs)
iv) Image plate holder ( the pink tray below the plates)
v) Konad special nail polishes (O.P.I/ Sally Hansen or any such high end polishes)

Following are some tutorial videos I came across and liked, go through them if you are interested and start drooling on Konad Nail Art like I do :P


There are loads of other videos available on YouTube.  Go and check them out too.
Let me know how you liked the post!